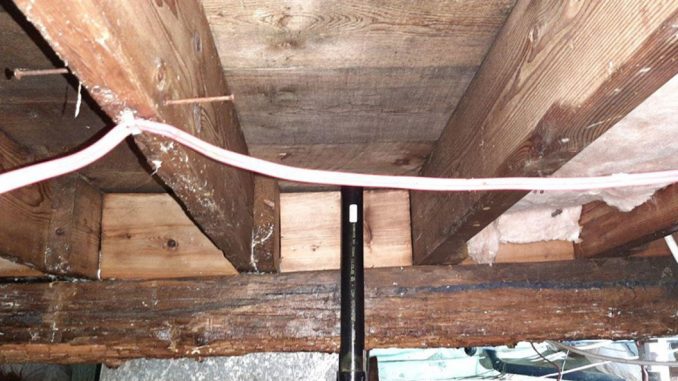
Yes, we are PipeRepair.co.uk. But problems caused by leaks and bursts are not just restricted to the pipe itself. Which is why we are tackling the repair of wood damaged by a leaking pipe.
Whereas metal, brick, stone or concrete surfaces nearby a leaking pipe can withstand water damage unless it is a serious leak, wood is not as resistant.
Even a slow leak can cause wood to soften, crumble and decay over time. Fortunately, moderate wood rot can often be repaired without removing and replacing the entire section.
Here is how to stabilise, restore and repair rotted wood damaged by a leaking pipe.
Step 1: Assess the damage to the wood
The first step before committing to any repair of wood damaged by a pipe leak is to determine whether it is salvageable. There are several encouraging signs to look out for when inspecting the wood.
A soft or crumbly surface which has not totally disintegrated means there are wood fibres which can be stabilised and used as a base for rebuilding. The overall structure needs to still be holding its shape.
Rot also needs to be confined to a small, reachable area. Restoring a sensible amount of damaged wood is one thing. Repairing all the wood in King Henry VIII’s Great Hall because of a major leak in the Hampton Court Palace pipework system would be quite another.
Signs that replacement might be necessarily include the wood being spongy all the way through its full thickness, the structural framing losing strength or if large sections have collapsed.
Step 2:Prepare the area of damaged wood undergoing repair
It should go without saying, but the damaged wood repair should only begin once the leaking pipe itself has been permanently sealed or replaced.
The area should then be dried as much as possible. Fans or a dehumidifier are the most effective way of extracting moisture from the wood.
A chisel, scraper or stiff brush is used to remove loose and crumbly wood. It is important to remove only wood which is no longer sound. Keeping as much undamaged wood as possible means there is less to rebuild.
This stage is vital to the success of the repair. Proper removal ensures the wood stabiliser can penetrate clean fibres. Lastly, vacuum all remaining dust and debris out of the cavity created during removal.
Step 3: Stabilise the wood
Stabilisation of the wood is achieved by turning any fibres left soft by water damage into a hardened resin. This can be done with a specialist wood hardener or for those with a lower budget, a low viscosity cyanoacrylate superglue.
Protect the surrounding areas with painter’s tape if needed. Then apply your wood stabiliser into the cleaned cavity. The wood will drink everything up.
Keep applying more stabiliser until it reaches the point where the wood is no longer absorbing it easily and then leave it to fully cure as per the timings on the product instructions. Depending on the stabiliser being used, this can take anywhere between one and 24 hours.
Rebuild the damaged wood using epoxy putty
Epoxy putty is a brilliant repair product for rebuilding wood. It starts off soft and mouldable, allowing it to be formed into the correct shape.
It will form a permanent bond to the damaged wood and then harden to become a strong, sandable and solid material.
Epoxy putty is either supplied with the resin and hardener in separate components or in a pre-formatted and measured stick.
Where Part A and Part B are apart, measure out equal amounts and mix by hand. For a stick, simply cut enough putty off and knead.
The putty is mixed until it turns a uniform colour with no streak. It is then pushed firmly into the stabilised cavity, filling voids and building up missing sections.
Shaping the surface is done by hand and the putty can be smoothed off with a little water. Once the damaged wood has been rebuilt, the putty is left to cure.
Again, the timing of this will depend on the product. Some epoxy putties have a work time as fast as three minutes. Others will not begin to cure for between two and three hours.
For wood repair, a slower setting epoxy putty is often better. It means the user can take their time thoroughly and accurately shaping the putty, instead of rushing out of concern it will start curing off before the application is finished.
Finish the damaged wood repair
Cured epoxy putty can be treated like wood, enabling a high-quality finish. It can be sanded, ground, filed, tapped, drilled, screwed, sawed and machined. It will even accept paint or stain to match the colour of the surrounding surface.
This repair method is not just useful for wood which has been damaged by a leaking pipe. It also applied to trim, cabinetry, sub-floors, window sills, frames and all other wooden areas vulnerable to moisture.

Leave a Reply